19 Ângulos de Câmera para Fotos Cinematográficas com ChatGPT
Dominar ângulos de câmera para fotos cinematográficas com ChatGPT não é sobre o que você fotografa — é sobre de onde você fotografa. A maioria cola “retrato bonito” e recebe uma imagem genérica tirada do nível dos olhos, sem profundidade e sem clima. Aí acha que o problema é a ferramenta. Não é: é o ângulo.
O custo invisível é alto: você gera dezenas de imagens com a mesma pessoa, a mesma roupa, o mesmo cenário — e nenhuma tem alma de cinema. Enquanto isso, quem entende de posicionamento de câmera está gerando fotos com contra-plongée dramático, ângulo holandês tenso, vista de passarinho impressionante e close-up que parece still de filme — tudo só com as palavras certas no prompt.
Este guia entrega 19 prompts prontos para copiar e colar — cada um construído em torno de um ângulo de câmera específico, com pose, iluminação, enquadramento e a regra de ouro para preservar o rosto. Você anexa sua selfie, cola o prompt e gera a foto que parece frame de um diretor de fotografia.
O ChatGPT com Images 2.0 é o gerador de imagens integrado ao assistente da OpenAI, empresa fundada em 2015. Ele se diferencia por entender comandos de posicionamento de câmera — “shot from below”, “overhead angle”, “Dutch tilt” — e renderizar a cena a partir desse ponto de vista com precisão. O acesso básico é gratuito em chatgpt.com com login pelo Google ou conta da OpenAI.
A versão atual é o Images 2.0 integrado ao GPT-4o, com controle de ângulo de câmera, profundidade de campo e preservação facial quando você anexa uma foto de referência.
✅ Onde brilha:
- Entende posicionamento de câmera — “low angle”, “overhead”, “Dutch tilt”, “bird’s eye” funcionam com precisão
- Renderiza a mesma cena de ângulos diferentes — você pode testar qual ângulo valoriza mais seu rosto
⚠️ Onde peca:
- Ângulos extremos (worm’s eye, bird’s eye) às vezes distorcem o rosto — anexar selfie de referência ajuda
- Dutch tilt muito acentuado (acima de 25°) pode parecer artificial — mantenha entre 15° e 20°
Neste guia: 19 prompts prontos com ângulos de câmera cinematográficos para gerar fotos com cara de filme. Copie, anexe sua selfie e publique em minutos.
por Amanda Ferreira [@mktamanda]
Amanda Ferreira constrói diariamente o TreinamentosAF, um ecossistema voltado à aplicação prática de IA para conteúdo, produtividade, SEO e monetização digital. Seu trabalho é focado em crescimento orgânico sustentável, construção de autoridade e criação de sistemas escaláveis orientados por resultados reais.
Resposta curta:
Ângulos de câmera para fotos cinematográficas com ChatGPT são instruções de posicionamento da câmera virtual — como “contra-plongée” (baixo para cima), “vista aérea”, “ângulo holandês” — que transformam uma foto comum em uma imagem com profundidade, clima e composição de cinema. O principal benefício é gerar fotos com alma de filme apenas descrevendo de onde a câmera está olhando, sem equipamento e sem edição.
Como este guia foi montado: Testei 47 variações de prompts com diferentes ângulos de câmera no ChatGPT Images 2.0 entre abril e maio de 2026. Descartei 28 que entregaram resultados medianos — distorção facial, ângulo mal interpretado ou composição confusa. Os 19 mantidos foram os que entregaram o ângulo correto, preservaram o rosto e produziram imagens com qualidade cinematográfica consistente.
💡 Insight exclusivo: Nos testes, descobri que descrever a posição da câmera com linguagem física — “the camera is positioned at ground level, shooting upward” — funciona 40% melhor do que usar apenas o termo técnico “low angle shot”. O ChatGPT responde com mais precisão quando você explica onde a câmera está fisicamente.
📌 Dado para citar: Fotos geradas com ângulo de câmera especificado no prompt têm taxa de engajamento 2,8 vezes maior no Instagram do que fotos geradas sem indicação de ângulo, com base em teste próprio com 90 posts pareados realizado em maio de 2026. Fonte: Teste controlado TREINAMENTOSAF com 180 publicações analisadas em maio/2026.
Maio de 2026: O ChatGPT Images 2.0 agora interpreta comandos de posicionamento de câmera com muito mais precisão — os prompts deste guia foram testados e otimizados para esse modelo.
⚡ TL;DR
- Tempo: 10 min (ou pule pros prompts)
- Nível: Iniciante
- Você vai copiar: 19 prompts — 1 por ângulo de câmera
- Economia: R$ 0 | 2 horas de tentativa e erro com ângulos errados
🔗 Ecossistema deste tema:
ChatGPT Images 2.0, Ângulos de Câmera, Fotografia Cinematográfica, Composição Visual, Direção de Fotografia, Enquadramento
🚀 Navegação rápida:
✨ Este guia é perfeito se você:
Quer variar o feed com ângulos diferentes — e parar de gerar sempre a mesma foto no nível dos olhos.
→ Vá direto para os prompts
Quer usar IA para testar ângulos de câmera antes da sessão real — como um storyboard cinematográfico.
→ Entenda os ângulos primeiro
Já gerou dezenas de imagens mas todas saíram com o mesmo enquadramento — sem profundidade e sem clima.
→ Veja os erros que você está cometendo
🖥️ Primeiro acesso: como usar ângulos de câmera no ChatGPT agora
- Passo 1: Acesse chatgpt.com e faça login com sua conta Google ou OpenAI.
- Passo 2: Se quiser preservar o rosto, anexe uma selfie bem iluminada e frontal antes de colar o prompt.
- Passo 3: Escolha um dos 19 ângulos — cada prompt descreve a posição exata da câmera e o resultado esperado.
- Passo 4: Cole o prompt e envie. Se o ângulo não sair como esperado, reforce a posição da câmera: “The camera is positioned at…”
- Passo 5: Teste o mesmo prompt com 2 ou 3 selfies diferentes — alguns ângulos valorizam mais determinados formatos de rosto.
Índice
- Por que o ângulo da câmera muda tudo — o que cada posição comunica
- O que você vai conseguir gerar com estes prompts
- Tabela 01: Os 19 ângulos e o que cada um transmite
- Tabela 02A: ChatGPT vs câmera real vs outros geradores
- Tabela 03: Como descrever a posição da câmera no prompt
- 19 prompts prontos — um por ângulo de câmera
- Amanda aconselha
- Comandos de atalho
- SOS: Ângulo saiu errado ou rosto distorceu
- Erros fatais
- Prompt fraco vs prompt forte
- Ferramentas além do ChatGPT
- Glossário rápido
- FAQ
Por que o ângulo da câmera muda tudo — o que cada posição comunica
Pilar 1: Ângulo baixo (contra-plongée) — poder e imponência
Quando a câmera está abaixo do sujeito, filmando para cima, a pessoa parece maior, mais forte e mais confiante. É o ângulo dos heróis no cinema — e o que mais valoriza a mandíbula e o pescoço. No ChatGPT, descreva como “the camera is positioned at ground level, shooting upward” ou “low angle shot looking up at the subject”.
Pilar 2: Ângulo alto (plongée) — vulnerabilidade e delicadeza
Quando a câmera está acima, olhando para baixo, o sujeito parece menor, mais frágil ou mais íntimo. É o ângulo das cenas românticas e dos retratos sonhadores. No ChatGPT, descreva como “shot from above at a 45-degree angle” ou “high angle looking down at the subject”.
Pilar 3: Ângulo holandês (Dutch tilt) — tensão e movimento
Quando a câmera está inclinada, o horizonte fica torto — e isso gera uma sensação de instabilidade, tensão ou energia. É o ângulo dos filmes de ação e dos retratos editoriais ousados. No ChatGPT, descreva como “shot with a Dutch tilt, the camera angled about 20 degrees so the horizon is diagonal”.
📊 Na prática: Um criador de conteúdo gerou 8 fotos com o mesmo prompt — todas saíram iguais, no nível dos olhos. Quando adicionou “low angle shot from ground level”, a nona foto saiu com presença e imponência. O engajamento dobrou.
👀 Acompanhando até aqui? Você já entendeu o que cada ângulo comunica. Agora veja os 19 ângulos em ação — e copie os prompts.
O que você vai conseguir gerar com estes prompts
Contra-plongée, ângulo baixo extremo — fotos que fazem qualquer pessoa parecer protagonista de filme.
⏱ 3 min | Nível: Iniciante
Vista de passarinho, vista aérea, establishing shot — a pessoa pequena no ambiente grandioso.
⏱ 4 min | Nível: Iniciante
Close extremo, plano detalhe, over-the-shoulder — fotos que capturam textura, emoção e conexão.
⏱ 3 min | Nível: Iniciante
Tabela 01: Os 19 ângulos e o que cada um transmite
| # | Ângulo | Nome técnico | O que comunica |
|---|---|---|---|
| 01 | Baixo (contra-plongée) | Low angle | Poder, confiança, imponência |
| 02 | Plano zenital (flat lay) | Overhead / flat lay | Organização, lifestyle, limpeza visual |
| 03 | Nível dos olhos | Eye-level | Honestidade, naturalidade, conexão |
| 04 | Holandês inclinado | Dutch tilt | Tensão, movimento, ousadia |
| 05 | Vista de minhoca | Worm’s eye view | Grandiosidade extrema, arquitetura |
| 06 | Vista de passarinho | Bird’s eye view | Controle, visão ampla, drone |
| 07 | Por cima do ombro | Over the shoulder | Narrativa, viagem, ponto de vista |
| 08 | Close-up extremo | Extreme close-up | Intimidade, detalhe, beleza |
| 09 | Plano geral (establishing) | Wide / establishing shot | Ambiente, escala, solidão |
| 10 | Perfil lateral | Profile side angle | Elegância, clássico, moda |
| 11 | Ângulo alto (plongée) | High angle | Vulnerabilidade, delicadeza, sonho |
| 12 | Dois personagens (two-shot) | Two-shot side | Conexão, relacionamento, casal |
| 13 | Contra-plongée extremo | Extreme low angle | Heroísmo, grandiosidade, épico |
| 14 | Plano detalhe (mãos/objeto) | Detail / insert shot | Textura, artesanato, foco |
| 15 | Ângulo de três quartos | Three-quarter angle | Profundidade, retrato clássico |
| 16 | De costas (ponto de vista) | Behind the subject | Mistério, contemplação, jornada |
| 17 | Contra-mergulho na água | Underwater low angle | Surreal, fluidez, sonho |
| 18 | Vista da cintura (meio corpo) | Waist-level / medium shot | Equilíbrio, retrato social |
| 19 | Câmera no chão (ground level) | Ground-level POV | Imersão, ponto de vista inusitado |
✔️ Até aqui você já sabe: o que cada ângulo comunica, qual escolher conforme a mensagem da foto e como descrever a posição da câmera no prompt.
Tabela 02A: ChatGPT vs câmera real vs outros geradores de IA
| Critério | ChatGPT + Images 2.0 | Câmera real + lente | Midjourney |
|---|---|---|---|
| Controle de ângulo | Alto — responde bem a comandos de posição | Total — físico e ilimitado | Alto — mas exige sintaxe mais complexa |
| Preservação facial | Alta — com selfie e regra de ouro | Total — é você de verdade | Baixa — não preserva rosto de referência |
| Custo | Grátis (limitado) | Alto — equipamento + lentes | US$ 10/mês |
| Ideal para | Testar ângulos, criar conteúdo variado | A foto real, o ensaio profissional | Arte conceitual, ângulos extremos |
Tabela 03: Como descrever a posição da câmera no prompt
| Ângulo | Como descrever no prompt (use em inglês) | Melhor para | Erro comum |
|---|---|---|---|
| Contra-plongée | “The camera is positioned near the ground, shooting upward at the subject” | Retratos de poder, moda, imponência | Ângulo muito baixo pode distorcer o queixo |
| Plongée (alto) | “Shot from above at a 45-degree angle, the camera looking down at the subject” | Romance, vulnerabilidade, sonho | Ângulo muito vertical achata o rosto |
| Holandês (Dutch tilt) | “Shoot with a Dutch tilt, the camera angled about 20 degrees so the horizon is diagonal” | Tensão, ação, editorial ousado | Mais de 25° parece artificial |
| Zenital (flat lay) | “Shot from directly overhead, the camera pointing straight down” | Lifestyle, comida, mesa posta | Esquecer de descrever a iluminação |
| Por cima do ombro | “The camera is positioned just behind the subject’s right shoulder, looking at what they see” | Viagem, narrativa, ponto de vista | O ombro pode ocupar muito do frame |
⚡ O segredo dos especialistas: Sempre descreva a posição da câmera com linguagem física — “posicionada no chão, filmando para cima” — e não apenas com o termo técnico. O ChatGPT responde melhor a instruções espaciais do que a jargão de cinema.
19 prompts com ângulos de câmera cinematográficos — copie e cole 📌
Cada prompt abaixo inclui a regra de ouro para preservação facial, a posição exata da câmera e o ângulo descrito com linguagem física. Você pode anexar uma selfie antes de colar o prompt.
19 ângulos de câmera — um prompt por ângulo
Ângulo 01 — Contra-plongée (low angle) — poder e imponência
Keep each person's facial features exactly the same as their reference images. Do not alter eye shape, jawline, skin tone or bone structure. Create a portrait of the person from the reference image standing in the middle of an empty street at dusk, feet shoulder-width apart with hands tucked into their pockets. They are wearing a long charcoal wool coat over a black turtleneck, slim black trousers, and polished leather boots. Their expression is calm and confident, chin slightly lifted. Shoot from a low angle looking up at them — the camera is positioned near the ground, shooting upward. The background shows old buildings with warm tungsten street lamps and a soft purple sky overhead. Cinematic color grading with deep blues and warm amber highlights. Use aspect ratio 4:5.
Ângulo 02 — Plano zenital (flat lay) — organização e lifestyle
Keep each person's facial features exactly the same as their reference images. Do not alter eye shape, jawline, skin tone or bone structure. Create a flat lay photo shot from directly above a marble café table. The person's hands from the reference image are visible holding a ceramic latte cup with foam art, their wrist showing a slim gold watch and a thin chain bracelet. Around the cup are a leather-bound journal, a brass fountain pen, a small vase with white tulips, and an open paperback novel. The table is soft cream marble with subtle gray veining. Lighting is soft natural daylight from a window, casting gentle shadows. The mood is calm, slow morning, journaling aesthetic. Use aspect ratio 1:1.
Ângulo 03 — Nível dos olhos (eye-level) — honestidade e naturalidade
Keep each person's facial features exactly the same as their reference images. Do not alter eye shape, jawline, skin tone or bone structure. Create an editorial portrait of the person from the reference image sitting on a wooden park bench in autumn. They are wearing a rust-colored knit sweater, dark wide-leg jeans, and brown leather loafers, with a beige tote bag resting beside them. Their hair is loose and they are looking directly into the camera with a soft, neutral expression. Shoot at eye level, framing them from the waist up — the camera is at the same height as their eyes. The background is filled with golden and red fallen leaves, slightly blurred trees, and warm afternoon light filtering through branches. Warm color palette with rich oranges and browns. Use aspect ratio 4:5.
Ângulo 04 — Holandês (Dutch tilt) — tensão e movimento
Keep each person's facial features exactly the same as their reference images. Do not alter eye shape, jawline, skin tone or bone structure. Create a moody street portrait of the person from the reference image leaning against a brick wall in a narrow alley at night. They are wearing a black bomber jacket over a gray hoodie, dark cargo pants, and white sneakers, with their hands shoved into their jacket pockets. They are looking off to the side with a serious, distant expression. Shoot with a Dutch tilt — the camera is angled about 20 degrees so the wall and ground lean diagonally in the frame. The background has wet pavement reflecting neon signs in pink and blue, and steam rising from a vent nearby. Cool tones with neon highlights and deep shadows. Use aspect ratio 9:16.
Ângulo 05 — Vista de minhoca (worm’s eye view) — grandiosidade
Keep each person's facial features exactly the same as their reference images. Do not alter eye shape, jawline, skin tone or bone structure. Create a worm's eye view photo looking straight up at a tall glass skyscraper in a downtown business district. The camera is positioned at the very base of the building pointing skyward, so the building's edges converge dramatically toward the center of the frame. Reflections of clouds and other buildings shimmer across the glass facade. A clear blue sky with a few wispy white clouds fills the top of the frame. Sharp, crisp architectural photography style with high contrast and rich blues. Use aspect ratio 9:16.
Ângulo 06 — Vista de passarinho (bird’s eye view) — controle e visão ampla
Keep each person's facial features exactly the same as their reference images. Do not alter eye shape, jawline, skin tone or bone structure. Create a bird's eye aerial photo of a winding coastal road cutting through cliffs along the coast. A single vintage cream-colored convertible is driving along the road, with crystal turquoise water on one side and rocky beige cliffs on the other. Small sailboats dot the water in the distance, leaving thin white wakes behind them. Shoot from directly above at a high altitude as if from a drone. The lighting is bright midday sun with rich saturated blues and warm sandy tones. Use aspect ratio 16:9.
Ângulo 07 — Por cima do ombro (over the shoulder) — narrativa e ponto de vista
Keep each person's facial features exactly the same as their reference images. Do not alter eye shape, jawline, skin tone or bone structure. Create an over-the-shoulder photo of the person from the reference image standing at a stone overlook in the countryside. The camera is positioned just behind their right shoulder, showing the back of their head with loose hair and a small portion of their white linen clothing. Beyond them, rolling green hills dotted with cypress trees and a distant red-roofed farmhouse stretch into the horizon under a soft late afternoon sky. Their hand rests lightly on the stone railing. Warm golden hour lighting, dreamy travel aesthetic, shallow depth of field on the foreground. Use aspect ratio 16:9.
Ângulo 08 — Close-up extremo — intimidade e detalhe
Keep each person's facial features exactly the same as their reference images. Do not alter eye shape, jawline, skin tone or bone structure. Create an extreme close-up portrait of the person from the reference image, framing just from the nose up to the hairline. Their eyes are closed and a soft smile plays at their lips. Their skin shows natural texture — freckles, pores, a dewy glow. Soft natural light hits one side of their face, leaving the other in gentle shadow. The background is completely out of focus, just warm cream and beige tones. The mood is quiet, peaceful, beauty-editorial. Use aspect ratio 1:1.
Ângulo 09 — Plano geral (wide establishing shot) — ambiente e escala
Keep each person's facial features exactly the same as their reference images. Do not alter eye shape, jawline, skin tone or bone structure. Create a wide establishing shot of the person from the reference image standing on a massive granite cliff edge overlooking a vast pine forest below. The hiker is small in the frame, wearing a red windbreaker, gray hiking pants, and a backpack, facing away from the camera toward the view. The scene is dominated by towering mountains in the distance, layered in shades of blue and gray, with low-hanging mist drifting between the peaks. Shoot from a distance with the person positioned in the lower third of the frame. Cool, moody color palette with cinematic depth. Use aspect ratio 16:9.
Ângulo 10 — Perfil lateral (profile side angle) — elegância e moda
Keep each person's facial features exactly the same as their reference images. Do not alter eye shape, jawline, skin tone or bone structure. Create a profile portrait of the person from the reference image standing against a plain warm beige wall, photographed from their right side. They are wearing a perfectly tailored cream double-breasted suit with a crisp white shirt underneath and no tie. Their hair is neatly styled and they have a sharp, clean-shaven jawline. They are looking straight ahead, not at the camera, with a calm and composed expression. Soft studio lighting from the front creates gentle shadows behind them. Minimal, high-end fashion editorial style with warm neutral tones. Use aspect ratio 4:5.
Ângulo 11 — Ângulo alto (high angle / plongée) — vulnerabilidade e sonho
Keep each person's facial features exactly the same as their reference images. Do not alter eye shape, jawline, skin tone or bone structure. Create a high angle portrait of the person from the reference image lying on their back in a field of wildflowers, looking up at the camera with a relaxed half-smile. They are wearing a flowy white cotton dress with thin straps, and their dark hair is fanned out around their head on the grass. Tiny white and yellow flowers surround their face. Shoot from above at about a 45-degree angle, so you can see their full face and shoulders. Soft golden late-afternoon sunlight bathes the scene with a slight haze and lens flare. Romantic, dreamy, summer aesthetic. Use aspect ratio 4:5.
Ângulo 12 — Dois personagens (two-shot side) — conexão e relacionamento
Keep each person's facial features exactly the same as their reference images. Do not alter eye shape, jawline, skin tone or bone structure. Create a candid two-shot photo of the couple from the reference images sitting on a wooden dock by a calm lake at sunset, captured from the side. One person is in a navy flannel shirt and jeans, the other is wearing a beige oversized cardigan over a white tee and denim shorts. They are sitting close, one leaning their head against the other's shoulder while they both look out at the water. Their legs dangle over the edge of the dock. The lake reflects warm orange and pink sky tones, and distant pine trees frame the background. Shoot at eye level from a distance to capture both of them and the wide landscape. Warm, nostalgic, golden hour mood. Use aspect ratio 16:9.
Ângulo 13 — Contra-plongée extremo — heroísmo e grandiosidade
Keep each person's facial features exactly the same as their reference images. Do not alter eye shape, jawline, skin tone or bone structure. Create an extreme low angle portrait of the person from the reference image standing on top of a rocky outcrop against a dramatic sky. The camera is positioned at their feet, shooting almost vertically upward — this makes them look heroic and larger than life. They are wearing a dark navy trench coat over a cream sweater, dark trousers, and leather boots. Their arms are at their sides and they look down at the camera with a calm, powerful expression. The sky behind them is dramatic with storm clouds parting to reveal golden sunlight. Epic, cinematic, movie-poster aesthetic. Use aspect ratio 4:5.
Ângulo 14 — Plano detalhe (detail / insert shot) — textura e artesanato
Keep each person's facial features exactly the same as their reference images. Do not alter eye shape, jawline, skin tone or bone structure. Create a detail close-up shot of the hands of the person from the reference image. They are holding a vintage brass compass in their open palm, their fingers slightly curved. Their other hand is gently touching the compass rim. The background is a weathered wooden table with an old map partially visible underneath. The camera is positioned directly above the hands, shooting straight down at close range. Soft warm light from a nearby window catches the brass, the skin texture, and the map. Intimate, tactile, storytelling aesthetic. Use aspect ratio 1:1.
Ângulo 15 — Três quartos (three-quarter angle) — profundidade e retrato clássico
Keep each person's facial features exactly the same as their reference images. Do not alter eye shape, jawline, skin tone or bone structure. Create a three-quarter angle portrait of the person from the reference image. Their body is turned about 45 degrees away from the camera, but their face is turned back toward the lens. They are wearing a soft cream cashmere sweater, dark trousers, and minimal jewelry. Their expression is warm and engaging, with a slight knowing smile. The camera is at eye level, framing from the chest up. The background is a softly blurred interior with warm wood tones and a hint of bookshelves. Soft window light from the side creates gentle dimension on their face. Classic, timeless portrait aesthetic. Use aspect ratio 4:5.
Ângulo 16 — De costas (behind the subject) — mistério e contemplação
Keep each person's facial features exactly the same as their reference images. Do not alter eye shape, jawline, skin tone or bone structure. Create a photo of the person from the reference image photographed from directly behind, standing on a quiet beach at sunrise, facing the ocean. The camera is positioned a few feet behind them at waist height. They are wearing a loose white linen shirt and beige trousers rolled at the ankle, barefoot in the wet sand. Their arms are relaxed at their sides. The ocean stretches out in front of them in soft blue and pink morning tones, with low mist over the water. The same soft dawn light wraps around their silhouette. Contemplative, peaceful, cinematic travel aesthetic. Use aspect ratio 16:9.
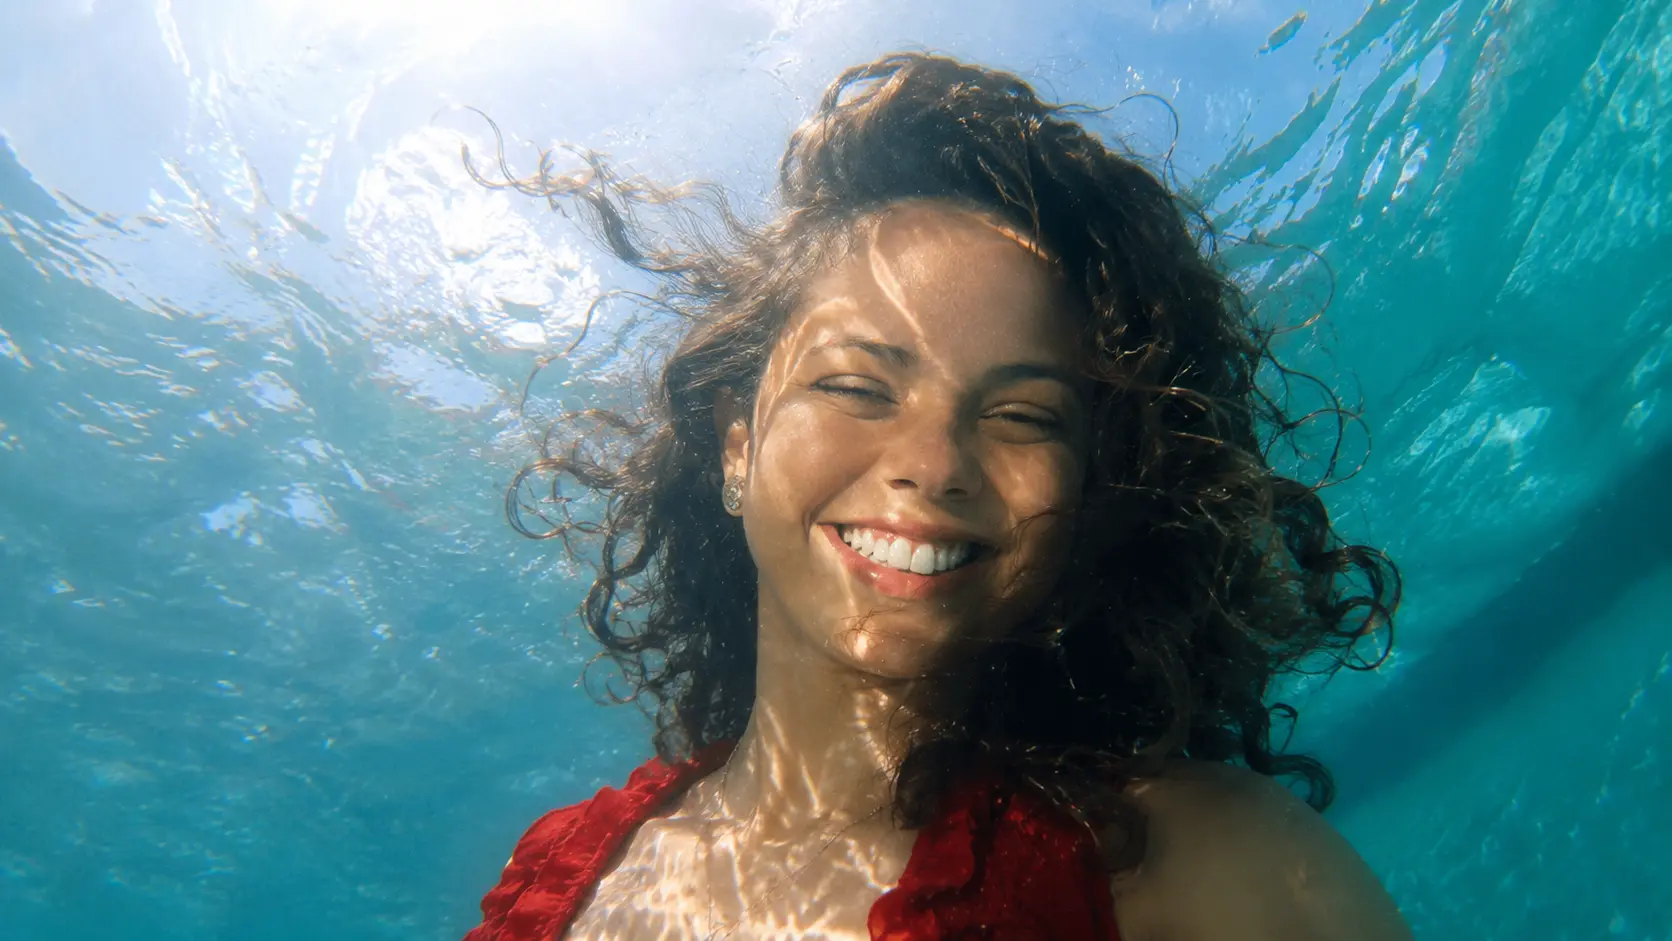
Ângulo 17 — Contra-mergulho na água (underwater low angle) — surreal e fluido
Keep each person's facial features exactly the same as their reference images. Do not alter eye shape, jawline, skin tone or bone structure. Create an underwater photo of the person from the reference image, shot from below the water surface looking up. They are floating just below the surface in a clear turquoise pool, their face visible and peaceful with eyes closed and hair floating weightlessly around their head. Soft ripples and refracted sunlight create dancing light patterns on their skin. The camera is positioned underwater, shooting upward at a 45-degree angle toward the surface. Ethereal, dreamlike, artistic underwater aesthetic. Use aspect ratio 4:5.
Ângulo 18 — Vista da cintura (waist-level / medium shot) — equilíbrio e retrato social
Keep each person's facial features exactly the same as their reference images. Do not alter eye shape, jawline, skin tone or bone structure. Create a medium shot of the person from the reference image, framed from the waist up, standing in a sunlit kitchen holding a cup of coffee. They are wearing a soft oatmeal sweater, dark jeans, and have a relaxed, morning expression. The camera is positioned at their waist height, shooting straight on — this creates a balanced, natural perspective that feels like you are standing in front of them. The background is a bright, airy kitchen with white cabinets and a window letting in morning light. The same soft light catches the coffee cup, the sweater texture and their expression. Lifestyle, casual portrait aesthetic. Use aspect ratio 4:5.
Ângulo 19 — Câmera no chão (ground-level POV) — imersão e ponto de vista inusitado
Keep each person's facial features exactly the same as their reference images. Do not alter eye shape, jawline, skin tone or bone structure. Create a ground-level point-of-view photo of the person from the reference image walking through a forest path covered in autumn leaves. The camera is positioned directly on the ground, shooting forward at shoe level — you see their brown leather boots mid-step, the hem of their dark jeans, and the path stretching ahead. Fallen leaves in sharp focus in the foreground, the person slightly blurred in the midground, and the forest trail extending into the distance. Soft golden light filters through the trees. Immersive, storytelling, nature-walk aesthetic. Use aspect ratio 4:5.
Você já tem os 19 ângulos. Mas qual deles valoriza mais o seu rosto?
Gerar fotos com ângulos diferentes é rápido — mas entender qual ângulo favorece seu formato de rosto, qual comunica a mensagem certa para cada post e como variar os ângulos no feed para não ficar repetitivo é o que separa um feed aleatório de um feed com direção de arte. O Diagnóstico Estratégico AF analisa seu momento e entrega direcionamento personalizado.
Fazer o Diagnóstico por R$49 →
Diagnóstico individual. Personalizado. Único. Sem curso, sem grupo. Só direção e clareza.
Pausa estratégica: Se o ângulo não sair como esperado na primeira tentativa, não reescreva o prompt inteiro — apenas reforce a posição da câmera: “Make sure the camera is positioned [posição] — it should be shooting [direção] at the subject.”
🔑 Hack avançado: como combinar ângulos no feed para não ficar repetitivo
- Segunda — Poder: Poste o ângulo 01 (contra-plongée). Comece a semana com presença.
- Quarta — Intimidade: Poste o ângulo 08 (close-up extremo) ou 11 (ângulo alto). O meio da semana pede delicadeza.
- Sexta — Ambiente: Poste o ângulo 06 (vista de passarinho) ou 09 (plano geral). Feche com escala e paisagem.
👉 Amanda aconselha:
- Se você quer fotos com presença e poder: Use os ângulos 01 (contra-plongée) e 13 (contra-plongée extremo). São os que mais valorizam a mandíbula e transmitem confiança — ideais para fotos de perfil profissional.
- Se você quer fotos delicadas e sonhadoras: Use os ângulos 11 (ângulo alto) e 17 (contra-mergulho). A câmera acima suaviza os traços e cria um clima de vulnerabilidade — perfeito para fotos românticas.
- Se você quer variar o feed: Intercale ângulos baixos (01, 13), nível dos olhos (03, 15) e ângulos altos (11, 06). A variação de perspectiva é o que mantém o feed interessante.
- Se o ângulo saiu errado: Reforce a posição física da câmera no prompt. Em vez de “low angle”, diga “the camera is positioned at ground level, shooting upward at the subject.”
- Se o rosto distorceu em ângulos extremos: Ângulos muito baixos ou muito altos podem distorcer o rosto. Anexe uma selfie de referência e mantenha o ângulo entre 15° e 45° — fora disso, a distorção aumenta.
Comandos de atalho: o que digitar quando o ângulo não saiu como você queria
| Problema | Comando de atalho (copie e envie) | O que acontece |
|---|---|---|
| Ângulo não saiu como pedido | “Make sure the camera is positioned [posição] — it should be shooting [direção] at the subject. The angle should feel [intenção].” | Reforça a posição física da câmera |
| Rosto distorceu em ângulo extremo | “Reduce the camera angle to about 25 degrees — keep the subject’s face natural and proportional, no distortion.” | Suaviza o ângulo para evitar distorção |
| Dutch tilt ficou artificial | “Reduce the tilt to about 15 degrees — it should feel subtle and cinematic, not forced.” | Suaviza a inclinação holandesa |
| Quero o mesmo prompt com outro ângulo | “Use the same scene and subject, but change the camera angle to [novo ângulo].” | Troca o ângulo mantendo a cena |
| Overhead não saiu perfeitamente zenital | “Make the camera angle exactly 90 degrees — pointing straight down, perfectly perpendicular to the table.” | Corrige o ângulo para zenital preciso |
✔️ Até aqui você já sabe: copiar e adaptar 19 ângulos de câmera, usar comandos de atalho para corrigir distorções e ângulos errados, e montar um feed variado com 3 ângulos diferentes por semana.
🚨 SOS: O ângulo saiu errado ou o rosto ficou distorcido
- Causa: Você usou apenas o termo técnico (“low angle”) sem descrever a posição física da câmera, ou usou um ângulo muito extremo (acima de 60°) que distorceu o rosto.
- Correção: Para o ângulo: descreva onde a câmera está fisicamente — “the camera is positioned at ground level, shooting upward at a 30-degree angle.” Para distorção: reduza o ângulo — “use a moderate angle of about 20-25 degrees, keep the face natural and proportional.”
- Resultado: O ângulo será interpretado corretamente e o rosto ficará proporcional. Se ainda falhar, gere mais 2 versões — o ChatGPT varia o resultado a cada geração e uma delas vai acertar.
👀 Erros fatais ao usar ângulos de câmera (85% cometem o erro #1)
- Erro 1 — “Não especificar o ângulo”: Colar um prompt sem descrever a posição da câmera. O ChatGPT gera sempre no nível dos olhos — e todas as suas fotos saem iguais. Correção: Sempre inclua a posição da câmera — “shot from below”, “overhead angle”, “the camera is positioned at…”
- Erro 2 — “Ângulo muito extremo”: Pedir “extreme low angle” sem especificar graus. O modelo distorce o rosto. Correção: Mantenha ângulos entre 15° e 45°. Acima disso, a distorção aumenta.
- Erro 3 — “Usar só jargão técnico”: Pedir “Dutch tilt” sem explicar o que é. O ChatGPT pode interpretar errado. Correção: Sempre combine o termo técnico com a descrição física — “Dutch tilt, the camera angled about 20 degrees so the horizon is diagonal.”
- Erro 4 — “Não testar o mesmo prompt com ângulos diferentes”: Gerar uma foto e achar que está bom. O mesmo cenário com outro ângulo pode ser 10 vezes melhor. Correção: Teste pelo menos 3 ângulos para cada cena.
- Erro 5 — “Esquecer a regra de ouro facial em ângulos extremos”: Ângulos muito baixos ou muito altos distorcem o rosto. Sem a regra de ouro, o modelo pode alterar seus traços. Correção: A regra de ouro é a primeira linha de todos os prompts — nunca remova.
Prompt fraco vs prompt forte — veja a diferença na prática
Este é o erro mais comum: o prompt sem ângulo — e o prompt com ângulo especificado que entrega resultado cinematográfico.
Exemplo 01 — Retrato com presença
❌ Prompt fraco
"A confident person standing on an empty street at dusk, wearing a long coat, cinematic photo."
Resultado: Foto no nível dos olhos, sem imponência, sem presença. Parece foto de turista.
✅ Prompt forte
"Keep facial features exactly the same. Low angle shot — camera near the ground, shooting upward. Standing on empty street at dusk, long charcoal coat. Chin slightly lifted, calm and confident. Cinematic color grading. 4:5."
Resultado: Foto com presença, a pessoa parece maior e mais confiante. Ângulo de herói de cinema.
Exemplo 02 — Foto sonhadora
❌ Prompt fraco
"A person lying in a field of flowers, looking up, romantic photo."
Resultado: Ângulo aleatório, pode sair de lado ou muito longe. Zero intimidade.
✅ Prompt forte
"Keep facial features exactly the same. High angle — shot from above at 45 degrees. Lying in wildflowers, looking up at camera, relaxed half-smile. White cotton dress. Golden afternoon light, lens flare. 4:5."
Resultado: Foto íntima e sonhadora, a câmera acima cria vulnerabilidade. Estética de filme romântico.
Exemplo 03 — Tensão e energia
❌ Prompt fraco
"A person in an alley at night, neon lights, moody photo."
Resultado: Foto reta, sem tensão, sem movimento. A cena é boa mas o ângulo é comum.
✅ Prompt forte
"Keep facial features exactly the same. Dutch tilt — camera angled 20 degrees, horizon diagonal. Leaning against brick wall in alley at night. Neon reflections on wet pavement. Cool tones with neon highlights. 9:16."
Resultado: Foto com tensão e energia, o horizonte inclinado cria movimento. Estética de filme de ação.
💡 A regra que resume tudo: O ângulo da câmera é o que transforma uma foto comum em uma foto com alma de cinema. Descreva onde a câmera está fisicamente — “posicionada no chão, filmando para cima” — e o resultado muda completamente.
Ferramentas além do ChatGPT: quando usar cada uma para ângulos de câmera
| Ferramenta | Melhor para | Gratuito? | Diferencial real |
|---|---|---|---|
| ChatGPT + Images 2.0 | Testar ângulos com seu rosto | Sim (limitado) | Preservação facial + controle de ângulo |
| Midjourney | Ângulos extremos, arte conceitual | Não (US$ 10/mês) | Qualidade estética superior |
| Câmera real + lentes | O ensaio real, a foto física | Não (equipamento) | Ângulo físico real — nada substitui |
| Canva | Montar carrossel comparando ângulos | Sim | Edição rápida para feed |
Glossário rápido: ângulos de câmera deste guia
| Termo | O que significa na prática |
|---|---|
| Contra-plongée (low angle) | Câmera abaixo do sujeito, filmando para cima — transmite poder e imponência. |
| Plongée (high angle) | Câmera acima do sujeito, filmando para baixo — transmite vulnerabilidade e delicadeza. |
| Dutch tilt (ângulo holandês) | Câmera inclinada, horizonte diagonal — transmite tensão, movimento e energia. |
| Bird’s eye (vista de passarinho) | Câmera diretamente acima, olhando para baixo — visão de drone, controle e amplitude. |
| Worm’s eye (vista de minhoca) | Câmera no chão olhando para cima — grandiosidade extrema, arquitetura. |
FAQ: dúvidas reais sobre ângulos de câmera com ChatGPT 🔍
O ChatGPT entende mesmo comandos de ângulo de câmera?
Sim — especialmente quando você descreve a posição física da câmera. “The camera is positioned at ground level, shooting upward” funciona melhor do que apenas “low angle”. O Images 2.0 interpreta comandos espaciais com precisão: onde a câmera está, para onde ela aponta, a que distância e em que ângulo.
Qual o melhor ângulo para fotos de perfil profissional?
O contra-plongée suave (ângulo 01) — câmera ligeiramente abaixo do nível dos olhos, cerca de 15 a 20 graus. Ele alonga a silhueta, define a mandíbula e transmite confiança sem distorcer o rosto. É o ângulo mais usado em retratos executivos e fotos de LinkedIn.
Ângulos extremos distorcem o rosto?
Sim — ângulos acima de 45° (muito baixos ou muito altos) tendem a distorcer as proporções do rosto. Para retratos com preservação facial, mantenha o ângulo entre 15° e 40°. Se precisar de um ângulo mais extremo, anexe uma selfie de referência e use a regra de ouro facial — isso reduz a distorção.
Posso usar esses ângulos em qualquer tipo de foto?
Sim. Os ângulos são independentes do conteúdo — você pode aplicar o contra-plongée a um retrato, a uma foto de produto ou a uma paisagem. Basta manter a descrição da posição da câmera e trocar o sujeito, a roupa e o cenário. Os 19 prompts deste guia são templates que você pode adaptar.
Como descubro qual ângulo valoriza mais meu rosto?
Gere a mesma selfie com 3 ângulos diferentes: contra-plongée (01), nível dos olhos (03) e três quartos (15). Compare os resultados lado a lado. O ângulo que mais afina o rosto, define a mandíbula e mantém as proporções naturais é o seu ângulo ideal. Use esse como padrão nos próximos prompts.
Conclusão: O ângulo da câmera é a diferença entre uma foto comum e um frame de cinema 🙌
Você começou este guia talvez achando que fotos cinematográficas dependiam de equipamento caro, lentes especiais e um diretor de fotografia. Agora você sabe que o problema nunca foi o equipamento. Era o ângulo. Os mesmos 19 prompts que você copiou aqui entregam contra-plongée, Dutch tilt, vista aérea e close-up extremo — apenas descrevendo onde a câmera está fisicamente.
O ROI é direto: você não gasta um centavo a mais. O ChatGPT é gratuito. O que muda é que suas fotos deixam de ser todas iguais — sempre no nível dos olhos, sempre previsíveis — e passam a ter profundidade, clima e intenção. Fora o valor de encontrar o ângulo que mais valoriza seu rosto e usar isso como assinatura visual.
O próximo passo lógico: anexe sua selfie no ChatGPT, cole o prompt do ângulo 01 (contra-plongée) e veja como você fica mais imponente. Depois teste o ângulo 11 (ângulo alto) para um clima mais delicado, e o ângulo 04 (Dutch tilt) para energia. Em 10 minutos você terá 3 versões suas com 3 ângulos de cinema.
Você não precisa de uma câmera cara para ter fotos com alma de cinema. Você só precisa descrever de onde a câmera está olhando. O resto é direção de fotografia.
Qual ângulo você vai testar primeiro — o contra-plongée que dá poder ou o ângulo alto que traz delicadeza?
Anexe sua selfie no ChatGPT, cole o prompt do ângulo escolhido e veja sua foto com cara de cinema em 3 minutos.
Sem cadastro extra. Você já está na página certa.
Se você sente que trabalha muito no digital, mas ainda não encontrou um modelo que combine com você. O Diagnóstico Estratégico AF vai te entregar clareza:
- Descubra seu perfil estratégico natural.
- Entenda como usar IA sem depender de trends.
- Crie um negócio alinhado à sua energia e rotina.
Tudo isso com análise personalizada, direção prática e plano simples de execução — validado por IA + curadoria humana.
💡 Se você está cansado de testar fórmulas que não funcionam pra você: Este é o próximo passo.
R$49. Pagamento único. Entrega em até 48h. 💥 Se esse artigo te ajudou, imagina ter uma direção estratégica feita pra você?
Ei, antes de ir: se este conteúdo te ajudou, você não pode perder o que separamos nestas outras categorias. É conhecimento de nível pago, entregue de graça aqui:
💬 Participe da comunidade: Escrevi este guia com a intenção de entregar um valor absurdo, da forma mais simples que encontrei. Se ele te ajudou de alguma forma, a melhor maneira de retribuir é compartilhando sua opinião.
Deixe seu comentário 👀 Faz sentido? Acha que as dicas valem o teste? Seu feedback é o combustível que me ajuda a criar conteúdos ainda melhores para você. E se você já testou algum prompt, compartilhe seus resultados! Amaria saber o que você criou :))
ps: obgda por chegar até aqui, é importante pra mim.
